Since one of the primary purposes for which I created this blog was to create a record of how I solved specific software coding issues, I needed to have a mechanism for displaying the different types of code I wanted to share.
Most of my work these days is done in using the .NET Core development stack, with a heavy emphasis on WASM (Web Assembly) Blazor on the client side. I saw from reading other blogs and websites that many people utilize either highlight.js or Prism to highlight code snippets. Both Javascript libraries can handle C#, ASP.NET, Javascript and Razor syntax, but after some experimentation, I settled on using Prism for this blog.
I ran into several problems while setting up Prism, so I felt that my first blog should detail the steps I followed so that others can avoid them.
Step 1: Setup your Blogger site
You'll find plenty of articles elsewhere detailing how to do this; the simplest approach is to start with the Blogger help page and go from there. While there are many different ways to setup a blog, Blogger appealed to me because it's essentially free. Google provides you with a website that you can customize however you want. They also provide you with usage statistics and other tools that allow you to manage your site through your browser.
Step 2: Create your custom Prism Javascript library and CSS file
While there are default Javascript and CSS files that you can use, these are only designed for highlighting markup languages like HTML, CSS, C-like programming languages and Javascript. The Prism website lets you build custom files designed for use with dozens of different programming languages and scripting languages. The Prism Download Page provides an easy-to-use form where you select those languages you want to highlight in your blog code snippets and it generates a new prism.js and prism.css file for you to download. I added support for C#, ASP.NET, JSON and C# Razor. Support for the aforementioned default languages will be added automatically.
Step 3: Store your Prism files on a CDN site
Blogger doesn't provide you with the means to store static files on their servers. If you want to leverage third-party Javascript or CSS files in your posts, you'll have to have some kind of server from which to reference them. There are a number of options available to you, but if you're a developer, then odds are you already have a Github site where you create code repositories for your various projects. If not, then head over to Github and create a free account.
Once you have an account, you'll want to log into it and create a new repository. Click on the Repositories tab, then click on the New button.

Be sure to make the repository public, create a README file where you can leave some details about the files contained in the repository. You won't need a .gitignore of a license so just choose None for both of these items.

Once you have created a new repository, you'll want to upload the prism.css and prism.js files you downloaded from the Prism website. From the Main branch of your new repository, click on the Add file dropdown and select Upload files.

Step 4: Create a Github Page
This next step may seem redundant, but it's actually essential in order to access the two Prism files from your blog. You can click on your files in the respository, and you'll not only see the file contents, but you'll also see a URL displayed in the browser address bar which seemingly you can use to access the file remotely. The problem is that when you request a file (Javascript, CSS, etc.) via this URL, it is served as a "text/plain" MIME type file. The end user's browser won't be able to interpret the file correctly and highlight the code snippets you are creating.
The way to resolve this issue is to create a Github Page. If you look at the image above, you'll see a gear icon labeled Settings. Click on that and then look for the link in the left sidebar under Code and automation where it says Pages.

You should choose the settings for the Build and Deploy section as shown in the example below. Once you click on the Save button, your files are ready to be accessed from your Blogger site.

Step 5: Edit your blog template
The key to referencing the Prism files is to construct the URL based on the following pattern: https://{username}.github.io/{repo}/{filename}. In my case, the two URLs are:
https://rlebowitz.github.io/Blogger/prism.css and https://rlebowitz.github.io/Blogger/prism.js
From your Blogger dashboard, click on the name of the blog you want to work with. This will take you to the Blog Overview page.
From the left sidebar menu, select the Template option.

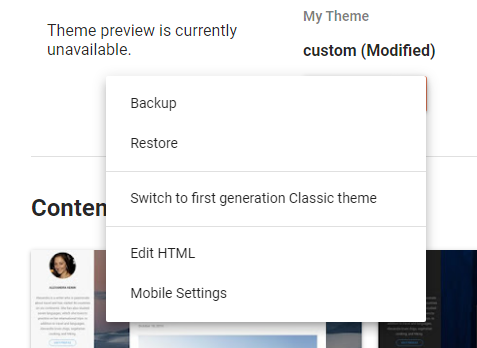
You should see a dropdown button used to customize your template. Click on the button and select Edit HTML.
Search (CTRL-F) to find the </head> element. Paste the following two elements just above the </head> element, making sure to use your Github Page URL.
<link href='https://{your site}.github.io/{your repository}/prism.css' rel='stylesheet'/>
<script src='https://{your site}.github.io/{your repository}/prism.js' type='text/javascript'/>
</head>
Save your template changes, and you are ready to start using Prism in your blog posts.
Important Information when using Prism with CSHTML / Razor code!!!
Directions on using Prism can be found on the Prism site. The general format you need to follow for CSHTML / Razor / Blazor code is:
<pre> <code class="language-razor"> {Your Razor code goes here} </code> </pre>You cannot simply copy and paste your CSHTML code from your code editor. Prism will NOT process it correctly. Instead, you need to encode any special characters like angle brackets and ampersands as HTML entities. You could do this manually, but the simplest approach is to use an editor that has a feature for this purpose. I use Notepad++ for this purpose. Once you've downloaded and installed the editor, go to the Plugins menu item, select Plugins Admin and install the HTML Tag plugin. Using the this handy tool will greatly simplify your life. There may be an extension for Visual Studio (I believe there is one for Visual Studio Code) that can achieve the same encoding, but this was the approach I adopted for my work.
No comments:
Post a Comment